
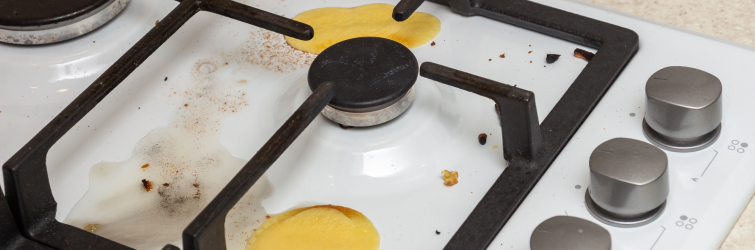
Welcome to the ultimate summer grease-busting guide! If your kitchen looks like a fried chicken crime scene – grease on the cabinets, a sticky film on the range hood (definitely not the rustic patina you were going for), and fingerprints on the fridge – you’re not alone. Summer cooking in Ontario can get messy fast. With kids home from school and more family cookouts, our kitchens see constant action, and all that action can leave behind stubborn grease and grime. But don’t sweat it (your kitchen is humid enough) – we’ve got you covered with witty, practical tips to vanquish grease while keeping things eco-friendly and fun.

Why Summer Heat & Humidity Make Grease a Bigger Beast
Ontario summers are no joke. In cities like Ottawa, Kitchener, Waterloo, and Cambridge, July days are warm and muggy – average humidity often ranges from 50% up to 80% (hello, frizzy hair and sticky countertops!). Kitchener, for example, sees around 79% humidity on average in July. What does that mean for your kitchen? In high humidity, grease doesn’t just dry out and sit quietly – it stays soft, tacky, and ready to trap every dust particle that dares to float by. The result: a grimy film that clings to cabinets and walls like it’s auditioning for a horror movie.
And it’s not just the humidity. Heat is a catalyst for grease troubles. Hot temperatures accelerate the breakdown of grease and food bits, which leads to stronger odors and faster buildup if you don’t clean it up. Ever notice a rancid smell near the stove after a few hot days? That’s old grease decomposing at warp speed thanks to the summer heat. Yuck! Plus, many of us cook more in summer – whether it’s frying up bacon for weekend brunch or grilling veggies and meats for backyard BBQs. Even if you’re grilling outside, chances are your indoor kitchen is bustling with prep work (marinades, sauces, side dishes) and lots of dishes, which means more opportunities for grease to splatter.
Lastly, summer often means we’re in and out of the house more – kids running through the kitchen, patio doors swinging open during a cookout – bringing in dust and dirt that sticks to any greasy surface. Combine all these factors (heat + humidity + activity) and you’ve got a recipe for grease buildup galore. No wonder a quick sauté can leave your kitchen looking like a “before” scene in a cleaning commercial.
The takeaway? Summer in Ottawa and the K-W region creates the perfect storm for grease: warm, wet air and busy kitchens. But don’t worry – understanding the challenge is half the battle. Next up, we’ll arm you with both natural hacks and commercial solutions to fight back.
Eco-Friendly Hacks to Remove Stubborn Kitchen Grease
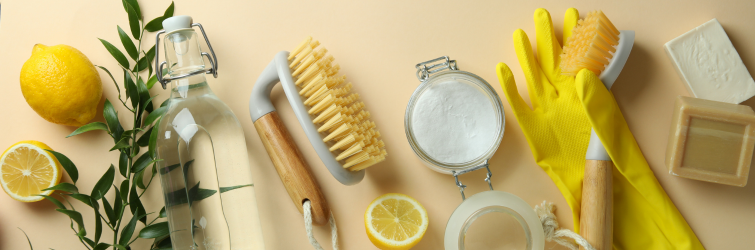
Many people today are ditching harsh chemical cleaners and turning to natural cleaning solutions to avoid fumes, protect the environment, and save a few bucks. The good news is your pantry is probably stocked with effective grease-fighters already. Let’s explore some tried-and-true eco-friendly methods to tackle that sticky mess:
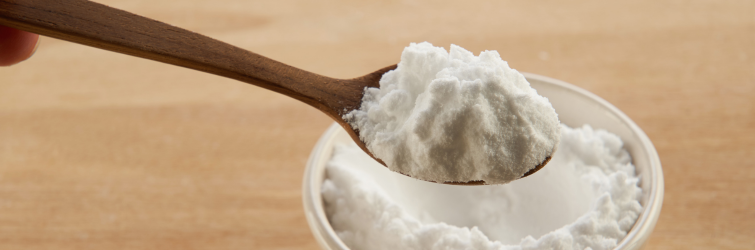
1. Baking Soda: The Grease-Busting MVP
Baking soda isn’t just for cookies – it’s a mild abrasive and alkaline powder that destabilizes fats and oils, basically breaking down grease so you can wipe it away. It’s gentle on most surfaces but tough on grime. Here’s how to use it:
Simple scrub: Dissolve 2–3 tablespoons of baking soda in a cup of warm water. Dip a sponge or cloth in the solution and scrub those greasy spots – from countertops to stovetops to cabinet doors. Rinse or wipe with a clean damp cloth.
Power paste: For really stubborn, baked-on gunk (looking at you, stove hood and oven door), make a paste of baking soda and a little water. Slather it on the greasy area and let it sit for 5–10 minutes. The paste will soften the grime. Then scrub with a sponge or non-scratch scouring pad and rinse clean. You can even sprinkle baking soda directly on a damp sponge for extra scrubbing power.
The beauty of baking soda is that it can cut through tough messes without scratching stainless steel or leaving any harsh chemical smell. And as a bonus, it acts as a natural deodorizer – so it helps neutralize any lingering fried-fish odor as you clean.

2. White Vinegar: The Acid Test for Grease
Good old white vinegar is a rockstar degreaser. Its acetic acid content literally cuts through grease molecules, making them water-soluble (so you can wipe them right off). Plus, vinegar naturally disinfects and deodorizes. Some easy vinegar-based tricks:
Basic vinegar spray: Mix equal parts white vinegar and warm water in a spray bottle. Spray it on greasy surfaces (stove, backsplash, counters), let it sit for a minute or two, then wipe with a microfiber cloth. This works great for fresh splatters or light grease films. The vinegar dissolves the grease, and the cloth should take it off with minimal elbow grease.
Citrus-infused vinegar: If you can’t stand the vinegar smell, try a trick borrowed from Grandma’s book – save citrus peels (lemon, orange, grapefruit) and steep them in a jar of vinegar for a couple of weeks. Strain the liquid into a spray bottle, and voila: you have a citrus-vinegar cleaner that’s extra strong on grease and leaves a pleasant scent. Spray and wipe as usual. The d-limonene in citrus plus vinegar’s acidity is a one-two punch for oily grime.
Tough love solution: For grease that’s been around a while (the sticky film on top of cabinets or the stove hood), upgrade your vinegar spray. Mix 1 cup of vinegar, 1 cup of baking soda, ½ cup of dish soap, and 3 cups of warm water. (Do this in a bowl slowly, as baking soda and vinegar will fizz!). Dip a cloth in the mixture and scrub the greasy surface. This concoction combines acid + mild abrasive + degreasing soap, and it works wonders on aged grease. Remember to rinse the area with clean water after scrubbing, and wipe dry.
Pro Tip: Warmed vinegar works even better. If you heat the vinegar (carefully) before using it, the heat can help loosen hardened grease. Just don’t boil it – warm to the touch is fine. You can also add a few drops of an essential oil (like lemon or lavender) to your vinegar spray to mask the smell and add extra cleaning oomph
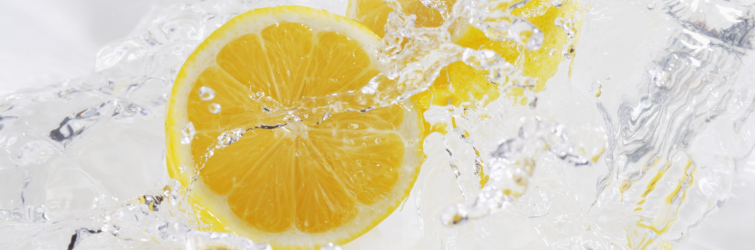
3. Citrus Power: When Life Gives You Lemons… Use Them on Grease!
Lemons (and other citrus fruits) are packed with a natural solvent called d-limonene, which is excellent at dissolving oils and grease. Plus, they have a nice fresh scent. Here’s how you can harness citrus for cleaning:
Lemon scrub: Cut a lemon in half, sprinkle the cut side with coarse salt, and use it to scrub greasy surfaces like cutting boards, oven door glass, or grimy corners of the countertop. The salt adds scrubbing power, and the lemon juice cuts the grease and bleaches away stains. After a few minutes of scrubbing, wipe the area with a damp cloth. This is a great natural trick for smaller greasy spots or sticky residue (for example, that spot near the stove where you always seem to spill oil).
Citrus oil spray: If you have pure lemon or orange essential oil, you can make a quick degreaser spray. Add about 15–20 drops of citrus essential oil to 2 cups of warm water, plus a tablespoon of baking soda, in a spray bottle. Shake it up and spray on greasy surfaces. Let it sit for a few minutes, then wipe clean. The combination of the oil (which helps break down grease) and baking soda (which scrubs and deodorizes) will leave surfaces shiny. And your kitchen will smell like a lemon grove instead of a deep-fryer!
One thing to remember with citrus: rinse or wipe off any residue. The natural acids can be sticky if left behind. Also, avoid using straight lemon juice on delicate surfaces like natural stone countertops (the acid can etch them). Dilute it or stick to the spray method for those.

4. The Baking Soda & Vinegar Fizz (Tag-Team Method)
We mentioned baking soda and vinegar separately, but together they form a bubbly combo that’s helpful in certain situations. When combined, baking soda (a base) and vinegar (an acid) react to form carbon dioxide gas – that’s the fun fizz you see – which can help physically lift grime and gunk from surfaces. While the fizz is happening, you get a bit of an effervescent scrub.
Fizzing paste for stubborn spots: Make a thick paste of baking soda and white vinegar. (It will foam up, then settle into a paste.) Apply this paste to nasty greasy spots – think the top of the microwave, the inside of the oven door, or the tops of cabinets where a grease-dust mixture has practically become part of the decor. Let the paste sit for 5-10 minutes as it fizzes and penetrates the grime. Then scrub with a sponge and rinse off. This method is especially good for vertical surfaces (like a greasy wall or cabinet front) because the paste can cling and work its magic before dripping down. For cabinet doors above the stove, users swear by this fizz method to rescue them from that sticky orange sheen.
Keep in mind, the baking soda + vinegar reaction loses cleaning power once it finishes fizzing. So it’s best used immediately and not stored. It’s often more effective to use baking soda and vinegar sequentially rather than premixing too much. For example, scrub with baking soda paste first, then spray vinegar and wipe – you’ll get some fizz and double the degreasing action.

5. Steam Cleaning (with a Fresh Twist)
Ever notice how easily grease comes off when you’re scrubbing a hot, steamy pan? Heat and moisture are grease’s kryptonite. You can use steam to loosen hardened grease on surfaces, essentially melting it so you can wipe it off. You don’t need a fancy steam cleaner gadget; here’s a DIY approach:
Stovetop steam bath: Fill a large pot with water and bring it to a boil on your stove. (Add a few slices of lemon or a few drops of lemon essential oil to the water for an extra grease-fighting boost and a nice smell.) Once it’s boiling, reduce to a simmer and let the steam billow out and waft over your stovetop, backsplash, and cabinets for about 10-15 minutes. The hot steam will soften the caked-on grease on your stove, range hood, and surrounding surfaces. After steaming, turn off the heat and carefully remove the pot. Then take a cloth (wear kitchen gloves to protect your hands from the heat) and wipe down all the now-damp, loosened grease. It should come off much easier. Stubborn spots can be given a final pass with a vinegar spray or a bit of baking soda on a sponge.
Microwave steam trick: Cleaning a greasy microwave is a breeze with steam. Fill a microwave-safe bowl with water and a tablespoon of vinegar or a few lemon slices. Microwave on high until the water boils and the microwave is steamy inside (about 2-3 minutes). Keep the door closed for another 5 minutes to let that steam work on the interior. Then open up and wipe the inside with a cloth – grease and splatters should wipe out without scrubbing. Plus, this trick deodorizes the microwave (no more old popcorn or spaghetti sauce smell).
Steam is wonderful because it’s purely water (maybe with a natural additive like lemon) – truly eco-friendly and chemical-free. Just be cautious with steam around electrical components and keep children away from the hot water. Also, ventilate if your kitchen gets overly steamy to avoid adding too much humidity (we have enough of that in summer!).
These five natural methods – baking soda, vinegar, citrus, the combo, and steam – are all budget-friendly and planet-friendly ways to wage war on kitchen grease. They prove you don’t always need harsh chemicals to get a clean, sparkling kitchen. In fact, you likely have these ingredients on hand, making them perfect for a spontaneous cleaning spree when the stove backsplash suddenly starts to feel like flypaper.
Before we move on, one quick note: eco-friendly doesn’t mean you shouldn’t take precautions. Even vinegar and baking soda can irritate skin or eyes, so wear rubber gloves when scrubbing and don’t get splashes in your eyes. Ensure good ventilation (open a window while cleaning, if it’s not 40°C outside!) to keep fresh air flowing.
Beat the Grease: Preventive Tips for Summer Kitchens
Now that your kitchen is (soon to be) sparkling, how do you keep it that way through the rest of the summer? Here are some practical tips tailored to our local climate and lifestyle to prevent grease build-up in the first place. A little effort each day can save you from a massive degreasing session later on.

1. Use That Range Hood or Fan
We just mentioned it, but it’s worth emphasizing: always ventilate properly when cooking. Turn on your exhaust fan or range hood every time you fry, sauté, grill on a grill pan, or broil something. The fan helps absorb moisture and capture grease particles in the air, rather than letting them settle on your walls and cabinets. In the summer, it also removes some heat, which is a bonus. If you have a window in the kitchen, crack it open while cooking to let fresh air in (humidity permitting) – it helps carry away the oily smoke.
Also, clean your hood’s grease filters. A clean filter traps more grease. If your fan isn’t ducted to the outside (some just recirculate through a charcoal filter), ensure that charcoal filter is replaced as recommended, so it actually absorbs odors and grease.
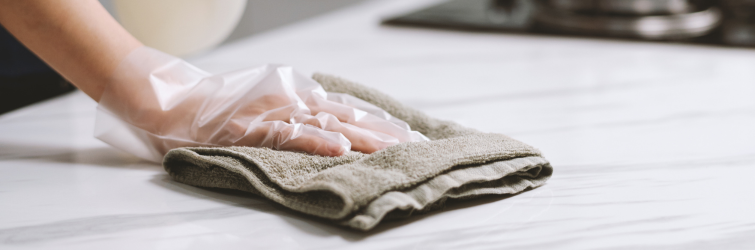
2. Wipe Surfaces Regularly (Don’t Wait)
This sounds obvious, but it’s the golden rule: clean as you go. After you finish cooking a meal, take two minutes to wipe down the stove, countertops, and any areas prone to splatters (the wall behind the stove, the front of the oven, etc.). Use a simple solution like hot soapy water or a vinegar spray to remove any fresh oil splashes or film. Fresh grease comes off 100x easier than old, set grease. If you get into the habit of a quick wipe after each cooking session, you’ll prevent the gradual buildup that leads to those thick sticky layers.
Summer tends to bring a more laissez-faire vibe – we’re busy, or we’d rather relax after dinner than clean. But remember that in the humid heat, yesterday’s tiny grease splatter can turn into tomorrow’s gummy stain if left untouched. By doing small daily clean-ups, you save yourself from major clean-ups down the line. Your future self (the one who’d otherwise be scrubbing for hours) will thank you!

3. Cover Pans and Contain Splatters
When frying or sautéing, use lids or splatter screens on your pans to minimize how much oil escapes onto your stove and backsplash. A mesh splatter screen is great for something like frying bacon or samosas – it allows steam out but catches most of the flying grease droplets. If a recipe allows, partially cover the pan with a lid. This simple step can prevent a lot of the mess before it happens.
If you’re cooking something uncovered that’s splattery (e.g., searing meat, frying fish), try to keep your oil at a reasonable temperature (excessively hot oil smokes and spits more). And position a spoon rest or tray for oily utensils rather than plopping them on the counter. Little things like that keep grease from spreading.
Also, consider doing particularly greasy cooking outdoors if possible. Many Ottawa and K-W homeowners love their BBQs – and guess what, your BBQ grill is a great place to cook messy foods like steaks or burgers where grease drips and splatters are expected. It keeps the worst of the grease outside. Just remember to keep your grill maintained and clean as well (that’s a whole other guide!).

4. Keep the Kitchen Cool and Dry
On super humid days, if you have air conditioning or a dehumidifier, use it. Lower humidity in the kitchen means less moisture for grease to grab onto (and it keeps you comfortable while cooking). If it’s not too hot, you can also use fans to keep air circulating when you cook – moving air can help carry away moisture and fumes. The idea is to avoid that steamy, fogged-up kitchen scenario where every surface feels sticky.
After boiling pasta or doing anything that pumps moisture into the air, run the range hood or vent fan for a while to clear out humidity. High humidity (common in Ottawa’s July evenings) can actually cause a bit of condensation on cooler kitchen walls or cabinets, and if there’s even a tiny layer of grease there, guess what – dust will stick right to it in that moisture. So, keep your kitchen as dry as you reasonably can.
5. Dispose of Grease Properly
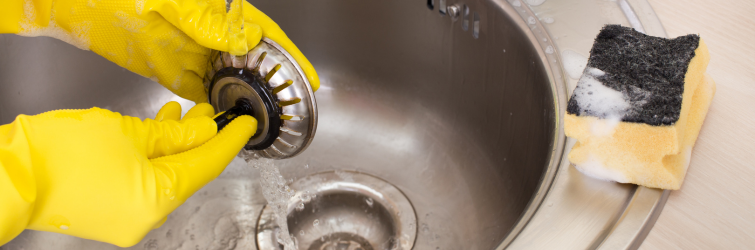
This is more about your drains, but it’s vital: never pour cooking grease down the sink. Hot grease seems liquid, but as soon as it cools in your pipes, it solidifies and can create monster clogs. In fact, about 47% of plumbing service calls are related to blockages caused by grease buildup in drains. You do not want to be part of that statistic (or pay that plumbing bill!). To dispose of used cooking oil or grease: let it cool and solidify in a container (or mix it with an absorbent like coffee grounds) and throw it in the garbage. For smaller amounts, wiping the pan with a paper towel and tossing that works too. Keeping grease out of your plumbing will save you headaches – and it’s better for municipal sewer systems as well, which spend millions dealing with grease clogs.
Even when cleaning surfaces, rinse your sponges or cloths in a bowl or bucket, not directly in the sink, if they’re loaded with grease, to avoid too much oil going down the drain. You can dump that water outside or in a toilet (toilet pipes are wider) if needed. It’s an extra step, but considering a grease-induced plumber visit can cost $150–$450 on average, it’s worth it!

6. Deep Clean Problem Areas Monthly
Some spots in the kitchen are grease magnets and realistically need a deeper clean once in a while, even with good daily habits. In summer, aim to deep clean key areas about once a month:
Remove and clean stove burner grates (if gas) or electric coil drip pans. Soak them in hot soapy water, scrub and rinse.
Give your oven a clean (many ovens have an auto-clean function – use it on a cool evening when you can open windows, or use a baking soda paste for a manual scrub).
Wash or replace any grease-trapping filters (hood, as mentioned, and also check your microwave vent if it has one).
Wipe down the tops of cabinets or the fridge – grease can settle there and mingle with dust, forming that nasty gray grime. A vinegar-water solution is great here, or a degreaser spray.
Mop the kitchen floor with hot water and a degreasing cleaner (grease settles on the floor too, making it slick).
By scheduling these deeper cleans, you’ll prevent grease from accumulating to the point it becomes a major project. Put a reminder in your phone for mid-summer and late summer to tackle these tasks. It’s much easier to spend an hour now than four hours at the end of summer scrubbing everything at once.

7. Embrace Natural Degreasers Daily
Instead of saving the eco-hacks we discussed for emergencies, use them routinely! For instance, keep a spray bottle of the vinegar-water solution on hand and spritz the stove and counters after cooking each day. Or sprinkle baking soda in the sink and scrub once a week to keep it shiny and grease-free. These small habits using gentle cleaners will maintain your kitchen’s sparkle without much effort. Plus, you won’t be introducing strong chemicals into your home regularly – a win-win for you and the environment.
By combining good ventilation, prompt cleaning, smart cooking practices, and proper disposal, your kitchen will have a much better chance of staying grease-free all summer long. And when the inevitable minor grease mess does happen, you now have a whole arsenal of solutions – both DIY and store-bought – to handle it quickly.

Conclusion: Enjoy a Grease-Free Summer Kitchen (Plus a Little Help if You Need It)
A clean kitchen is not just about impressing your mother-in-law or having Instagram-worthy countertops – it’s about creating a healthier, more enjoyable space for the heart of your home. Summers in Ottawa, Kitchener, Waterloo, and Cambridge bring unique challenges with the heat and humidity, but with the tips from this guide, you’re fully equipped to handle the slickest of situations. From mixing up a baking soda paste to letting a commercial spray do the heavy lifting, there’s a method here for every grease grime scenario.
Remember, consistency is key: a few minutes of daily upkeep can prevent hours of scrubbing down the line. And don’t be afraid to get a little witty and make it fun – put on some music, turn kitchen cleaning into a game with the kids (who can wipe the cabinet the fastest?), or reward yourself with a cool popsicle after the work is done. Cleaning doesn’t have to be a dreadful chore, especially when you know you’re winning against that sneaky summer grease.
If at any point the grease battlefield feels overwhelming, or you’d rather spend your summer weekends relaxing than degreasing, the professionals at UrbanMop have your back. We’re all about helping Ottawa and K-W region homeowners enjoy a clean, stress-free home. Feel free to reach out for a free estimate on a deep kitchen cleaning. We’ll tackle the tough grease and grime for you – using safe, effective methods – so you can get back to enjoying your summer BBQs and lemonade, without the mess. Stay cool, stay clean, and have a fantastic summer!
Grease Cleaning FAQs
Why does kitchen grease build up faster in summer?
Heat thins oil into vapor, which settles as sticky film on nearby surfaces.
How does humidity make it worse?
Moist air mixes with grease, forming a tacky residue that’s harder to wipe off.
What’s the fastest everyday cleaner?
A squirt of dish soap in hot water—wipe while the surface is still warm.
Best eco-friendly degreaser on a budget?
Equal parts white vinegar and water in a spray bottle; wipe after one-minute dwell.
Any low-cost tools that help?
Use a splatter screen when frying and run the range hood (or a fan) every time you cook.
One daily habit to stay ahead of grease?
Give the stovetop and nearby counters a 30-second wipe after each meal.
Cooking tweak to cut summer mess?
Grill or bake instead of pan-frying, or cover pans with a lid to trap splatter.
Why does grease cause bad smells and bugs?
Warm, oily residue turns rancid quickly and attracts ants, flies, and roaches.
Renter-friendly way to protect cabinets?
Line cabinet tops or backsplash with removable parchment or foil—swap out monthly.
Quick fix for old, sticky grease?
Rub a paste of baking soda and a few drops of cooking oil, then rinse with hot soapy water.